Downloading and Installing World of Balance
Downloading the files
If you have a Windows computer, you can Click here to download a zip file of the Windows executable version of the game. After download, unzip the file and run the WoB_client_win executable file in the folder. A folder of resources will also be present after the unzip. This folder must be kept in the same directory with the executable.
If you have a different computer, to run World of Balance on your computer and join the fun and learning, we suggest that you follow the two step process described below. This process can also be used for Windows computers.
First, download and install the Unity game client. The present client was built using Version 5.3.5f1, but a newer version should be ok also. Click here to download the Unity game client.
Second, you need the latest WoB Unity client. There are two options to obtain latest client. You can visit the World of Balance GitHub repository and download or clone the latest client into your Unity game folder. In Windows the Unity game folder is normally in MyDocuments. Use Git to checkout the 'development' branch. Click here to access the World of Balance GitHub respository. The other option is to download the client in the form of a zip file and then unzip the file. Click here to download the client zip file. Copy this zip file to your Unity game folder and unzip it. Windows normally can unzip files automatically when you double click on them. With either option, the folder should be in your Unity game folder.
Getting Started Running Unity with WoB
Once you have downloaded these files, you can install Unity and run it. When you run it, you will see a screen similar to the one below.
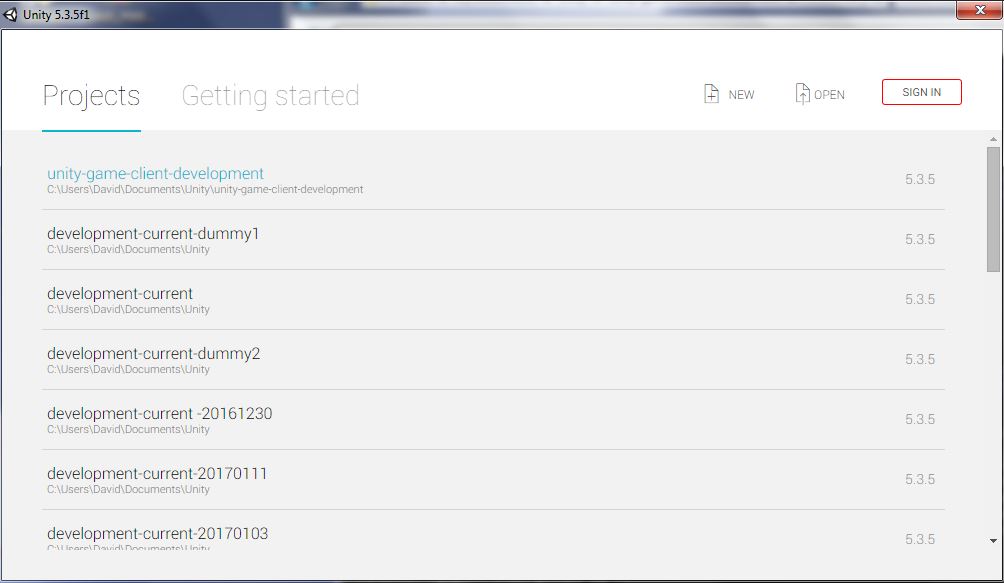
Since this is a new installation you may not be shown any of options to load previously loaded Unity games. However, the 'Open' option will be present near the upper right corner. Click that option and use the file explorer to navigate to your unzipped game folder. There may be two or more levels of nesting. Please click and select the deepest occurence of 'unity-game-client-development'. Please see the example below. Notice in this example there are three levels of nesting. Press 'Select Folder' to load the game.
You may receive a message indicating that the version of the game is different than the version of the Unity game client that you have. This is generally not a problem. You can click 'OK' on this. Please download the version listed near the top of this page or a newer version. When Unity first loads the game, it can take a long time. This only occurs during the first load as Unity will build intermediate files that will allow it to load faster the next time the game is loaded. Sometimes after the game loads the first time there will be error messages. These are not a problem. They can be cleared and the game played.

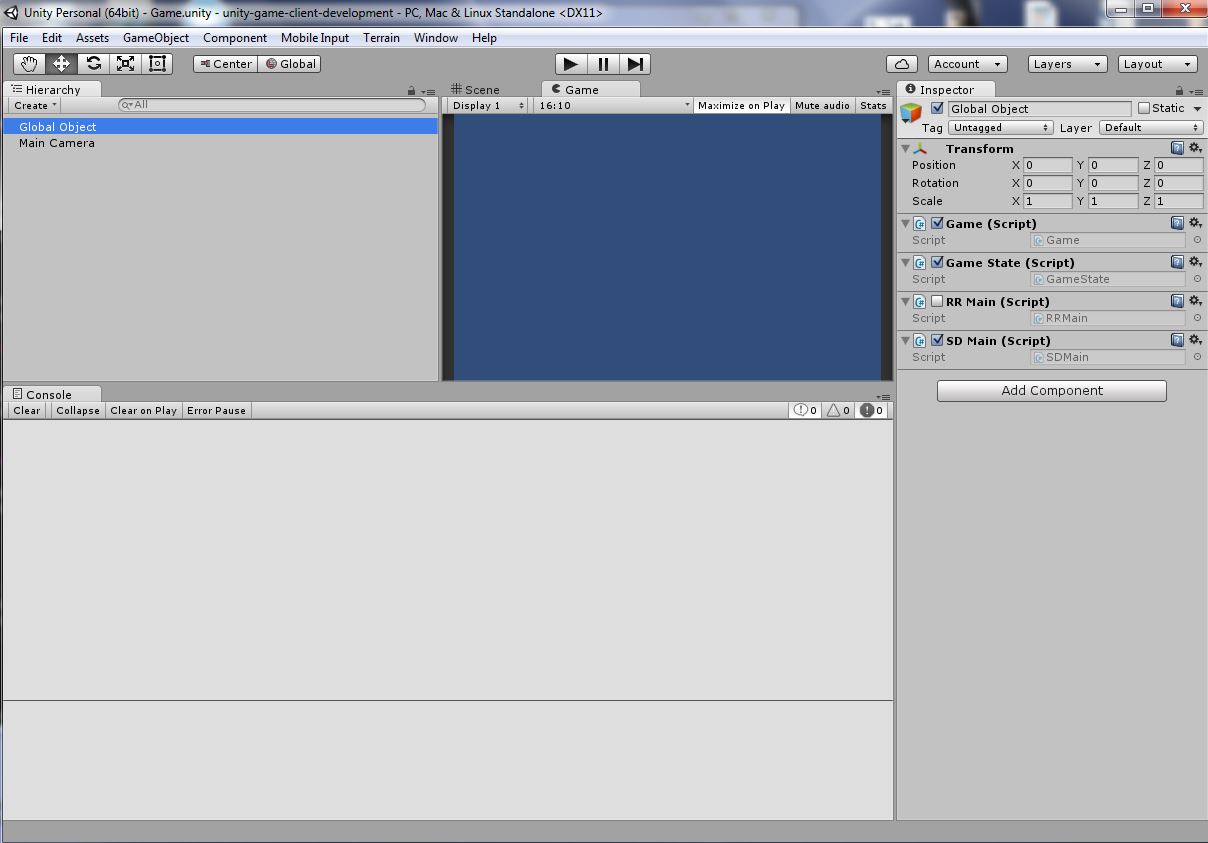
Proper starting screen for WoB
The screen below is the proper starting point for the WoB game. Notice in the left panel the item 'Global Object' is highlighted below. If you have that item in your left panel, please single click that item. The items in the right panel should appear basically as shown. If you have obtained this screen, please click the play button in the middle top of the screen. It is the arrow pointing to the right. It is not the right arrow with the vertical bar. After that you will be able see the login screen and you are ready to go to our Getting Started Guide to learn how to play the game. Click here to go to our Getting Started Guide.
If you do not see the screen below, continue down to the next section to learn how to get to the proper starting screen.
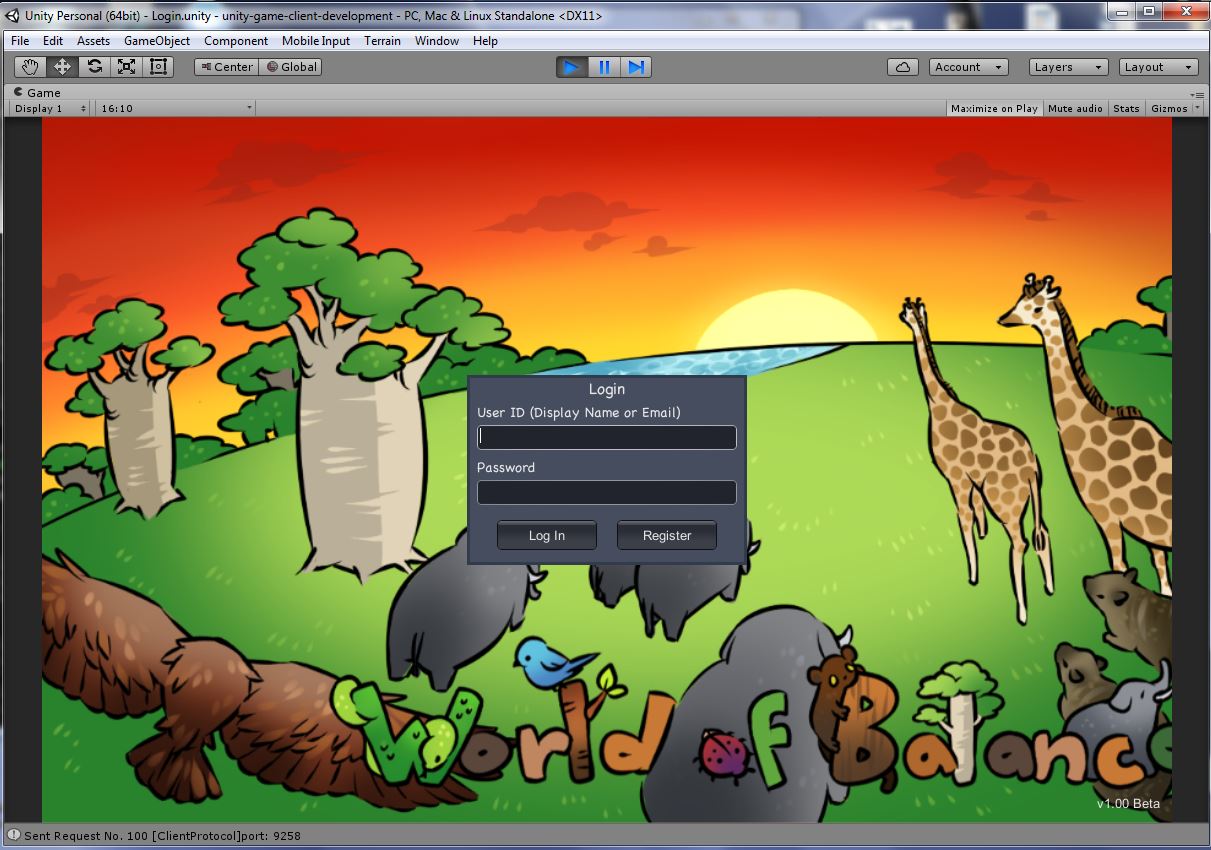
Login Screen
Getting to the proper starting screen for WoB
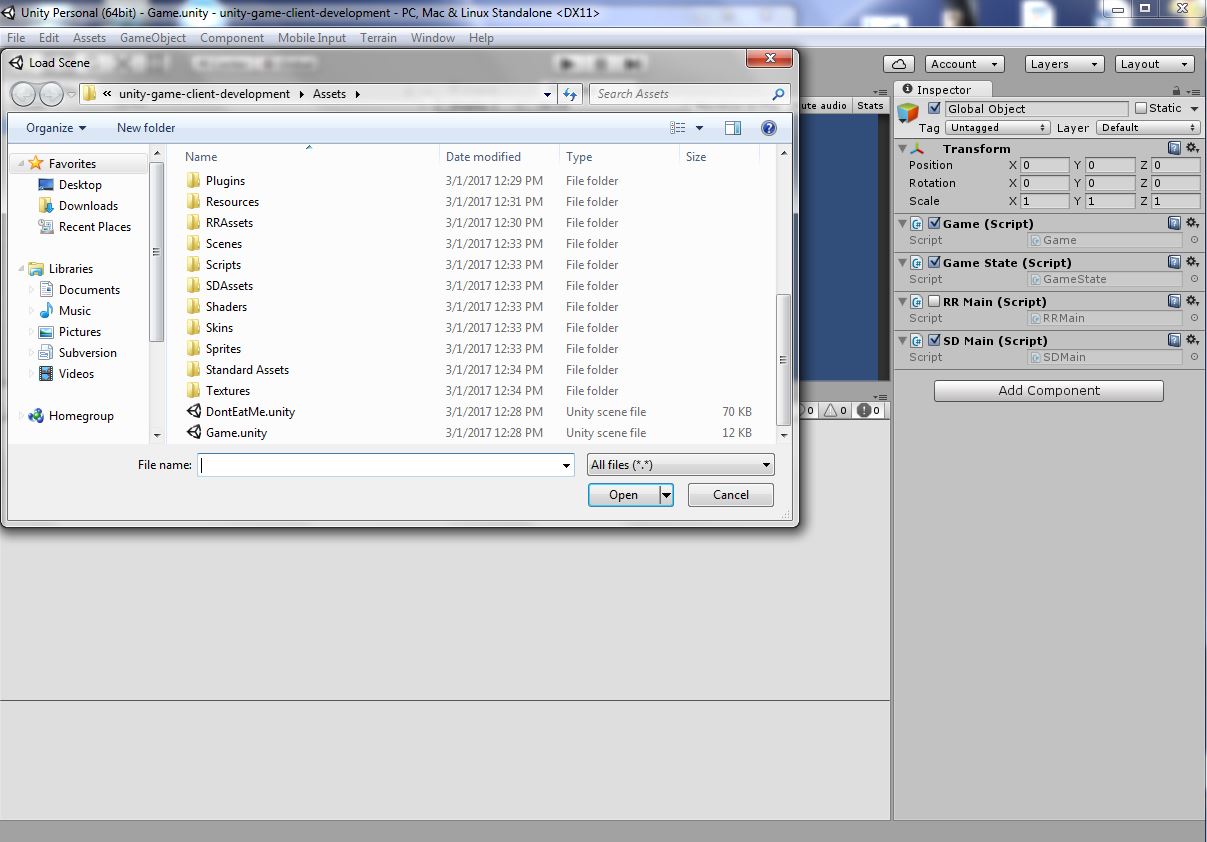
Getting to the proper starting screen for WoB is not difficult. On Unity, near the upper left corner, click 'File' and then 'Open Scene'. This should open up the file explorer. You should be pointed into the Assets folder. Scroll to the bottom and you should see a display similar to the one shown below. Single click the 'Game.unity' file and then click 'Open'. After that you should see the proper starting screen. To avoid this step next time, you can click 'File' and then 'Save Scene'.
Proper starting screen
Click here to go to our Getting Started Guide.